Interface and Options
General Interface

A. Project Name: Directly edit the project name using this input box. If you duplicate a project, a “
” suffix is added to the end.
B. 2D and 3D Views: Easily switch between different visualization modes (2D, 3D in person and 3D aerial views).
C. Account Button: You can log in, sign up or return to your project list ("My Projects" page).
D. Drawing Panel: Allows you to create new elements - walls, rooms, openings, furniture/décor, as well as, annotate the floor plan.
E. Property Panels: Modify existing elements on the floor plan. Each furniture/décor item and Room/Outdoor Space has its own property panel.
Autofill a Floor Plan with Items
- While in the "2D Plan" view, click the “Select” tool located in the black navigation bar and draw a box around all the items (can also be used for a single item such as a chair for creating a row of chairs).
- The Group Selection Properties window will open to the right
- In the Properties window input the number of rows going down (↓) and the number of columns going to the right (→) that is needed.
- In the Spacing field just below, insert the desired spacing (the first field is the spacing for the rows going down and the second field is the spacing for the columns going to the right).
- Click the "Generate XX Copies" button to fill the floor plan.
Annotation Tools
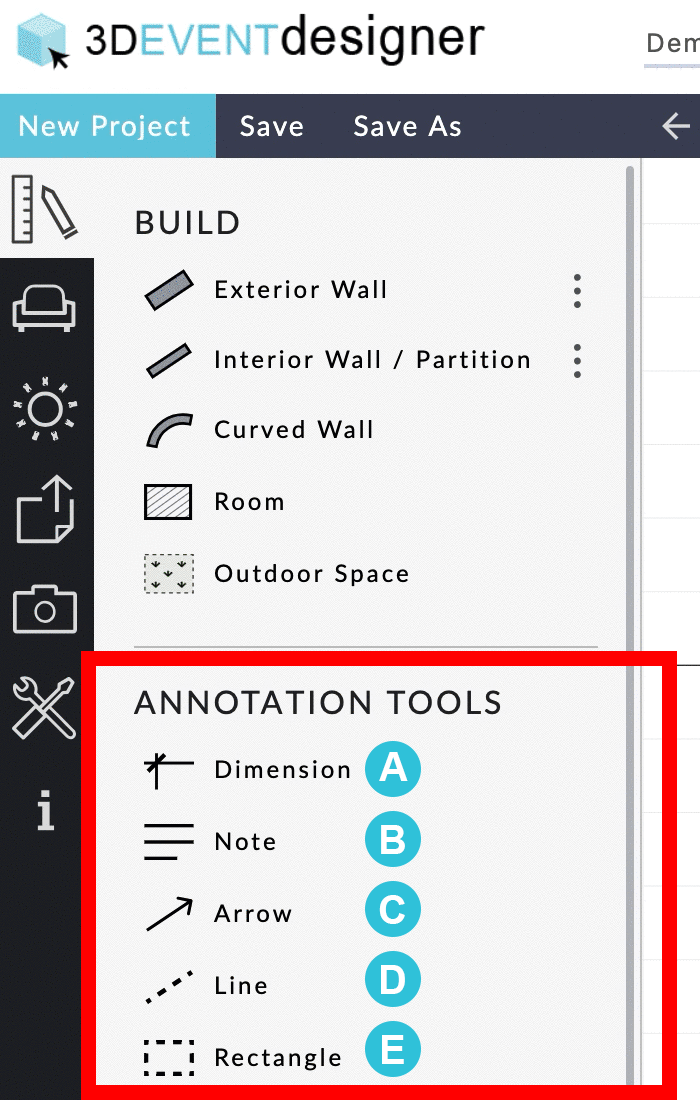
A. Dimension: Measure a distance on a floor plan.
B. Note: Add one or multiple notes to the floor plan.
C. Arrow: Draw an arrow on the floor plan (used best with the Note tool to point to an area or item (for example: point to a chaffing dish and use a note for the food content).
D. Line: Draw a line on the floor plan.
E. Rectangle: Draw a rectangle or squre on a floor plan (often used to mark off designated areas).
A. Dimension: Measure a Distance on the Floor Plan
- While in the "2D Plan" view, click on the "BUILD" tab.
- Click on the "Note" annotation tool.
- Click two (2) points on the floor plan.
- Click on the Note to open the Properties window and to write text, change colors, size and opacity.
B. Dimension: Add a Note on the Floor Plan
- While in the "2D Plan" view, click on the "BUILD" tab.
- Click on the "Note" annotation tool.
- In the workspace, draw a square or rectangle (click on the upper left corner of where you want the Note to be located and drag your mouse down to the bottom right).
- Click on the Note that is now in the workspace to open the Note Properties window and to write text, change colors, size and opacity.
C. Arrow: Draw an Arrow on the Floor Plan
- Click on the "Arrow" annotation tool.
- Click two (2) points on the floor plan.
- Move the 2 points to adjust it.
- Open the Arrow Property window to change the color of the arrow or delete it.
D. Line: Draw a Line on the Floor Plan
- While in the "2D Plan" view, click on the "BUILD" tab.
- Click on the "Line" annotation tool.
- Click two (2) points on the floor plan (the starting point of the line and the ending point).
- To edit the color or the type of line (solid or dashed), click on the line in the floor plan and the Line Properties window will open to the right.
E. Rectangle: Draw a Rectangle on the Floor Plan
- While in the "2D Plan" view, click on the "BUILD" tab.
- Click on the "Rectangle" annotation tool.
- In the workspace, draw a square or rectangle (click on the upper left corner of where you want the Rectangle to be located and drag your mouse down to the bottom right).
- Click on the Rectangle that is now in the workspace to open the Rectangle Properties window to change the color of it.
* Tip: Use to mark setup areas for other Vendors.
Create a Seating Chart
Embed Options
Easily embed an interactive floor plan on your website or blog by following the steps below:
- Open the floor plan you want to embed.
- Click on the "Share" dropdown located on the right in the top black navigation bar.
- Select the "Embed" option and the Embed window will appear.
- Copy the embed code that appears.
- Paste the code into your website or blog.
Group Items with Precision
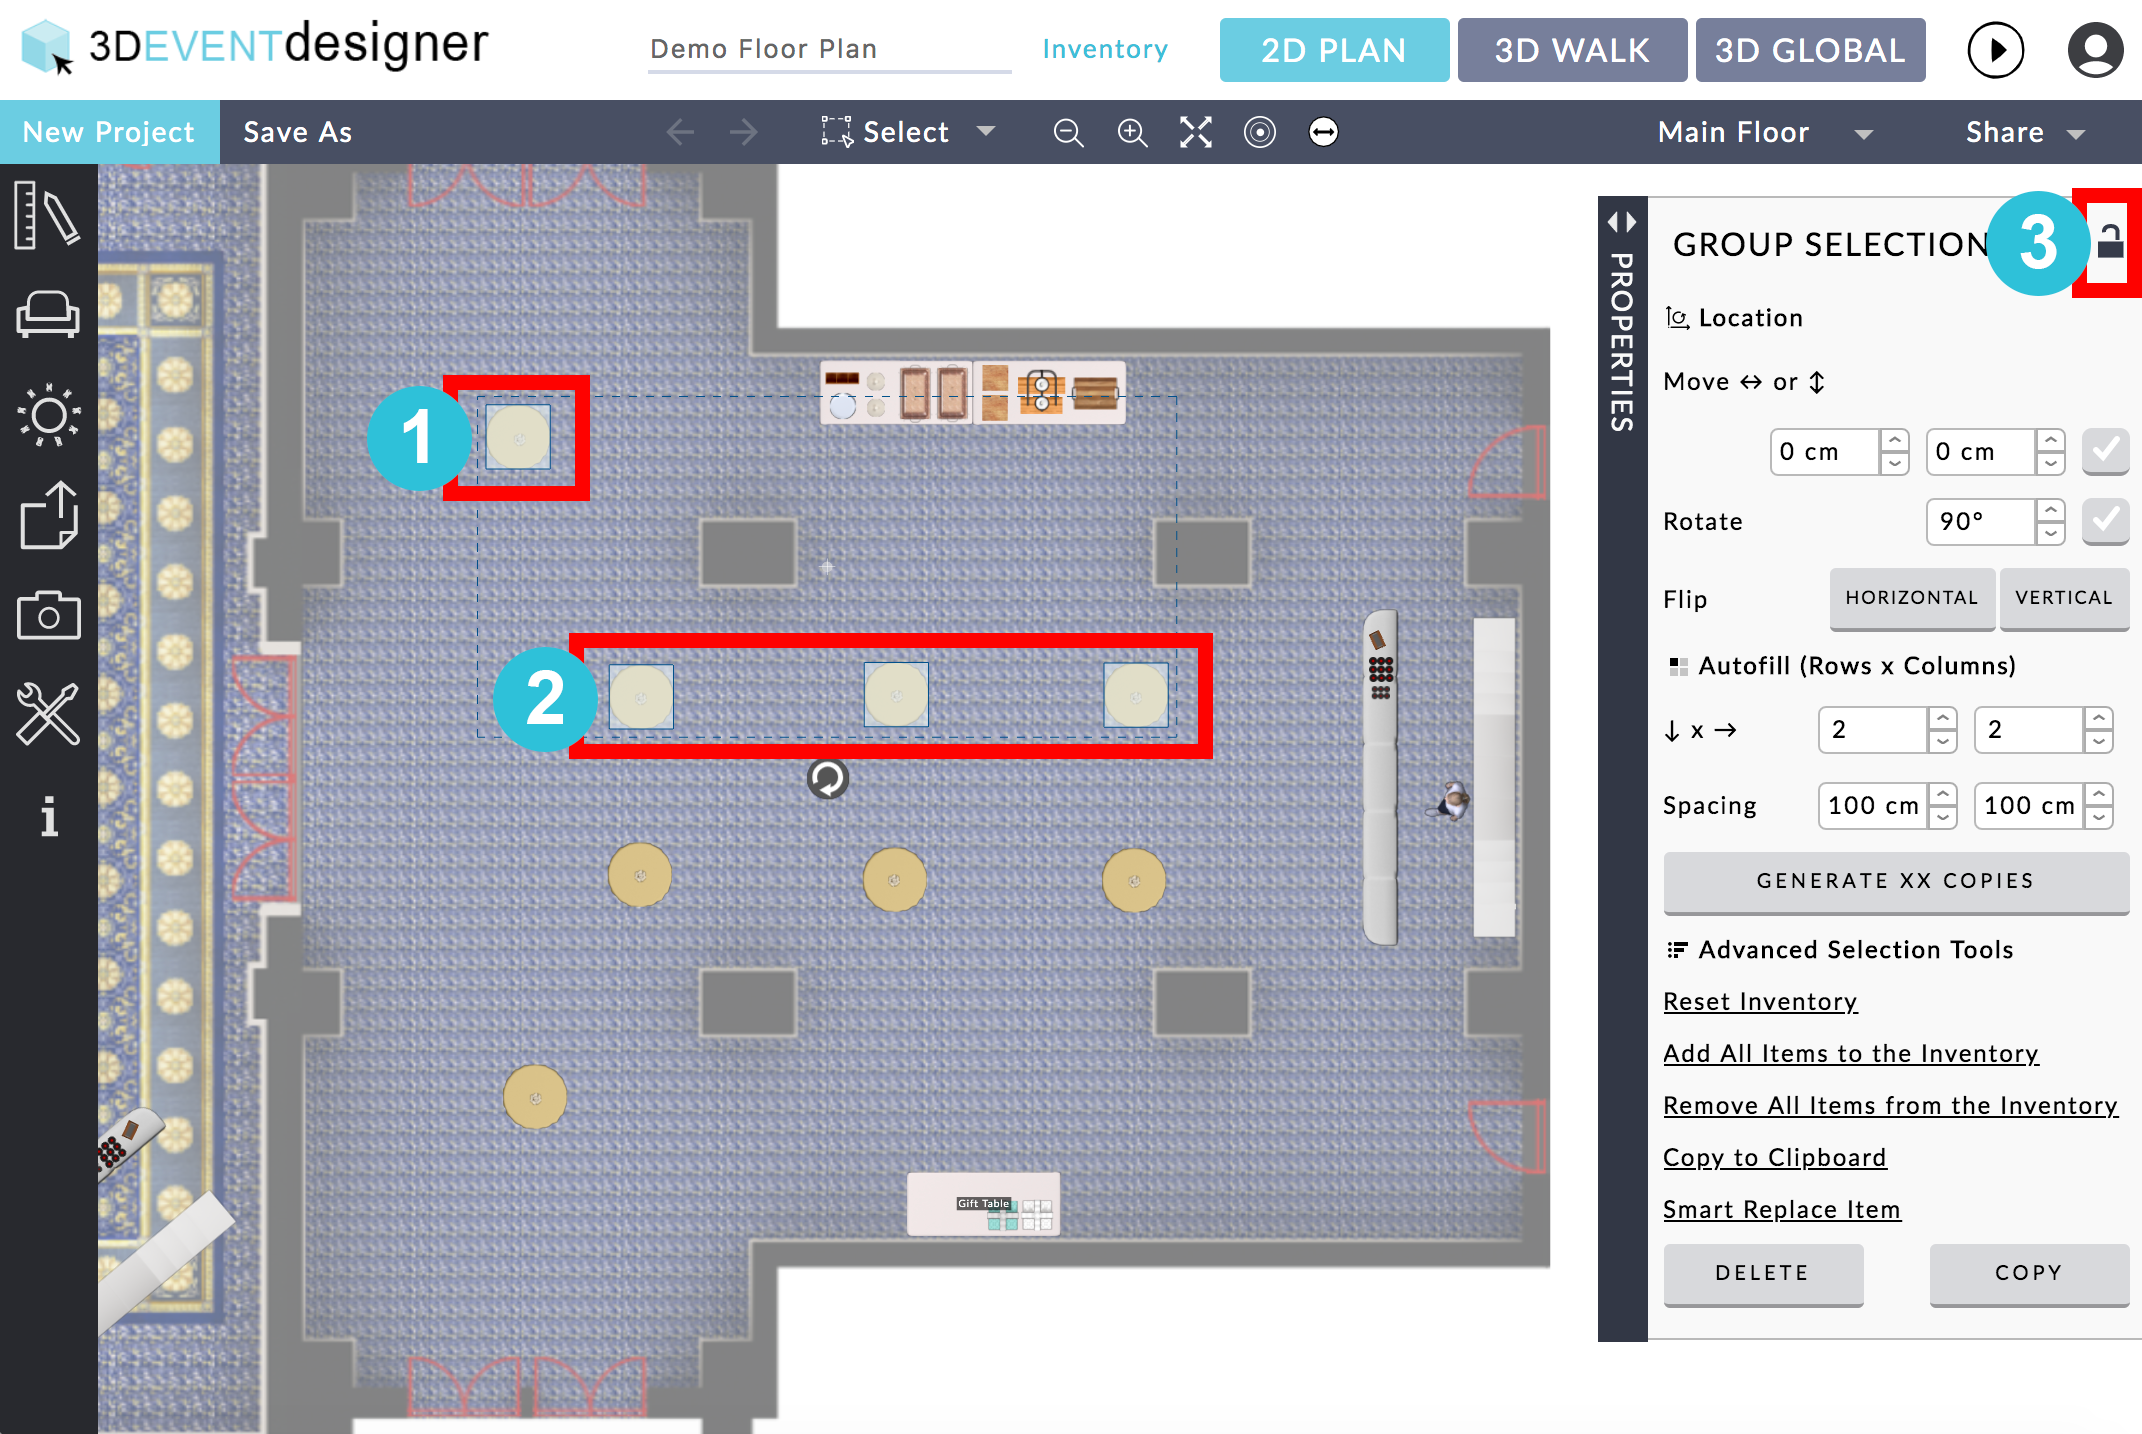
Now it's easy to select and group (or un group) only the items you want:
- Click on the first item.
- Hold down the Shift key and click each additional item you want to select (or unselect).
- To lock them together, click the "Lock" icon in the Group Selection Properties window that is on the right.
Keyboard Shortcuts
Now you can use keyboard shortcuts for many actions!
- Undo: Use Command+Z on Mac or Control+Z on Windows.
- Redo: Use Command+Shift+Z on Mac or Control+Shift+Z on Windows.
- Copy a Grouping of Items (when using the "Group Selection" tool): Use Command-C on Mac or Ctrl+C on Windows.
- Paste a Grouping of Items (when using the "Group Selection" tool): Use Command-V on Mac or Ctrl + V (or Shift + Insert) on Windows.